Cloud Agent
Available for Flex (SSIS) only
COZYROC Cloud Agent is a Windows service that is installed on each SSIS execution host and lets the COZYROC Cloud manage it. The installer can be downloaded from the web app when you sign in to your account. You can install an Agent on as many execution hosts as needed, but at least one is required before you are able to upload and execute packages.
Installation
Generate an Access key and download installer
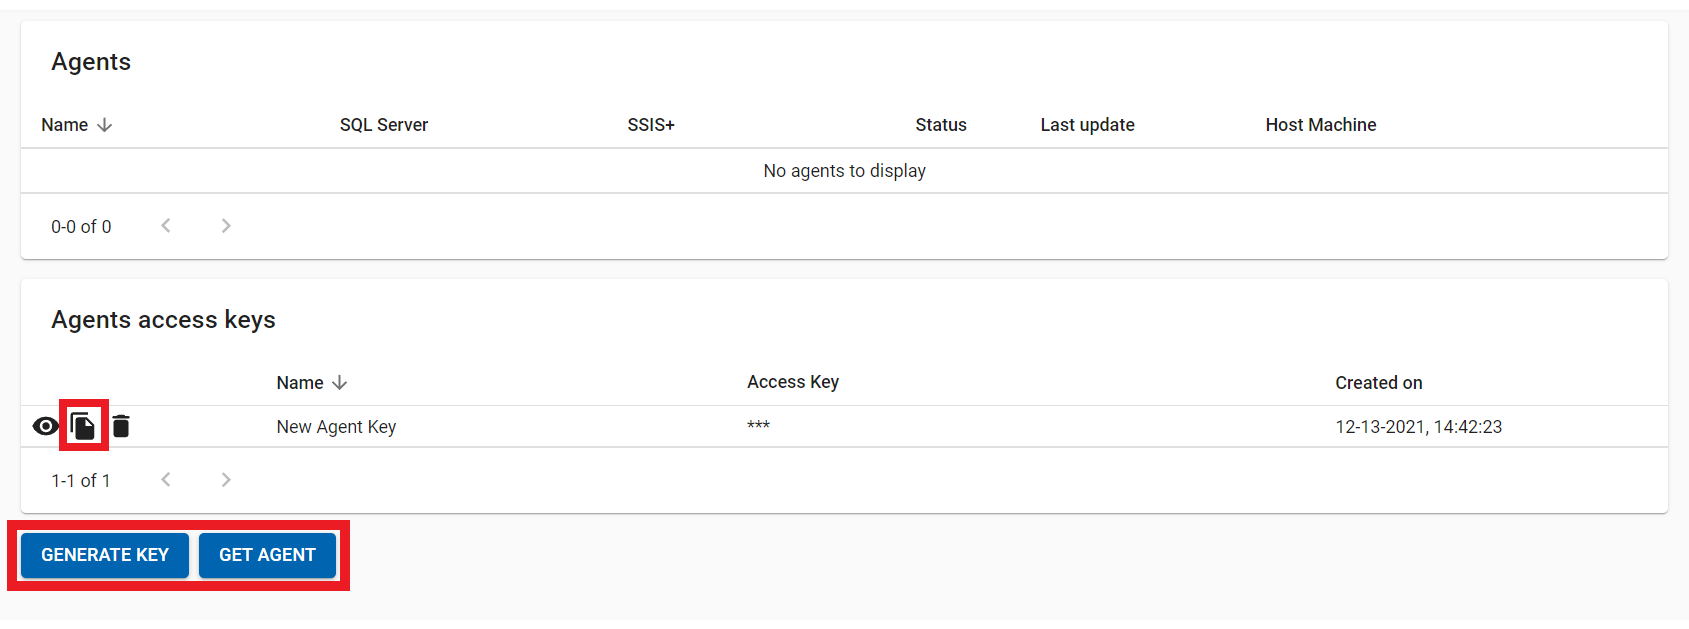
- Navigate to the Agents page. You can get to it via the
Executions Agentslink in the sidebar. If you haven't deployed any Agents yet, there will be a link to it on yourDashboard. - Click
GENERATE KEYto create anAgent access key. Give it a meaningful name and confirm. After that you can copy the key from here when theinstallerasks for it. Access keys can be reused for several Agents. - Click the
GET AGENTbutton to download the installer.
Install the Agent
- Start the
installerand follow the steps to accept theLicense agreementand select the installation folder. - On the
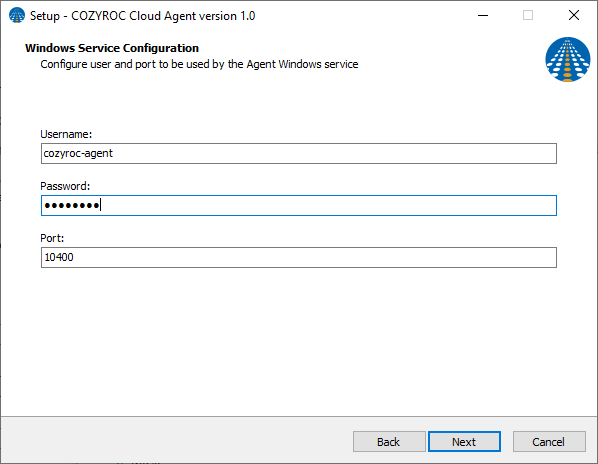
Windows Service Configurationstep specify the following:- Username: Username that will be used to run the
Windows service. The installer will automatically create a local user with the required permissions. - Password: Password for the service user.
- Port: A free port for the
Agent service. It doesn't need to be open to the public.
- Username: Username that will be used to run the
- On the
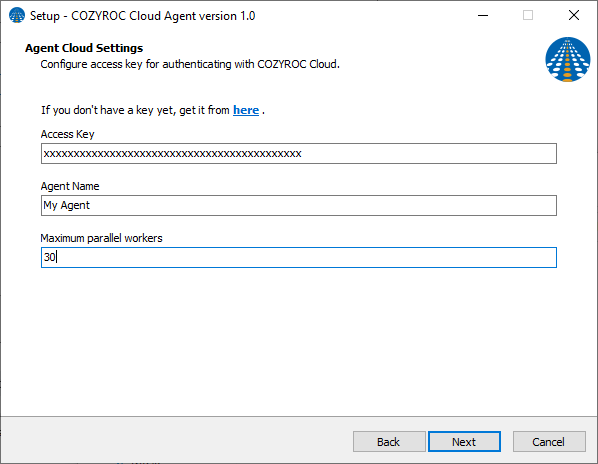
Agent Cloud Settingsstep, specify the following:- Access Key: Copy and paste the access key generated earlier.
- Agent Name: A descriptive name to let you recognize the Agent in the Web application.
- Maximum parallel workers: The number of executions that are allowed to run simultaneously on the Agent host. That number depends on your resources and needs. Default is 30.
- On the
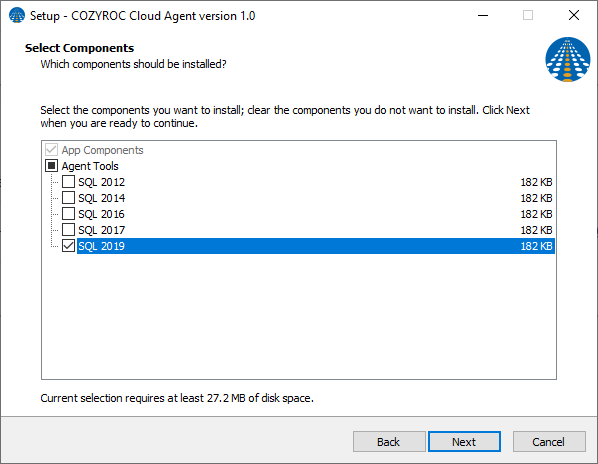
Select Componentspage, select the item(s) matching theMicrosoft SQL Serverversion installed on your execution host.
- Complete the installation by following the installer steps.
Verify Agent installation
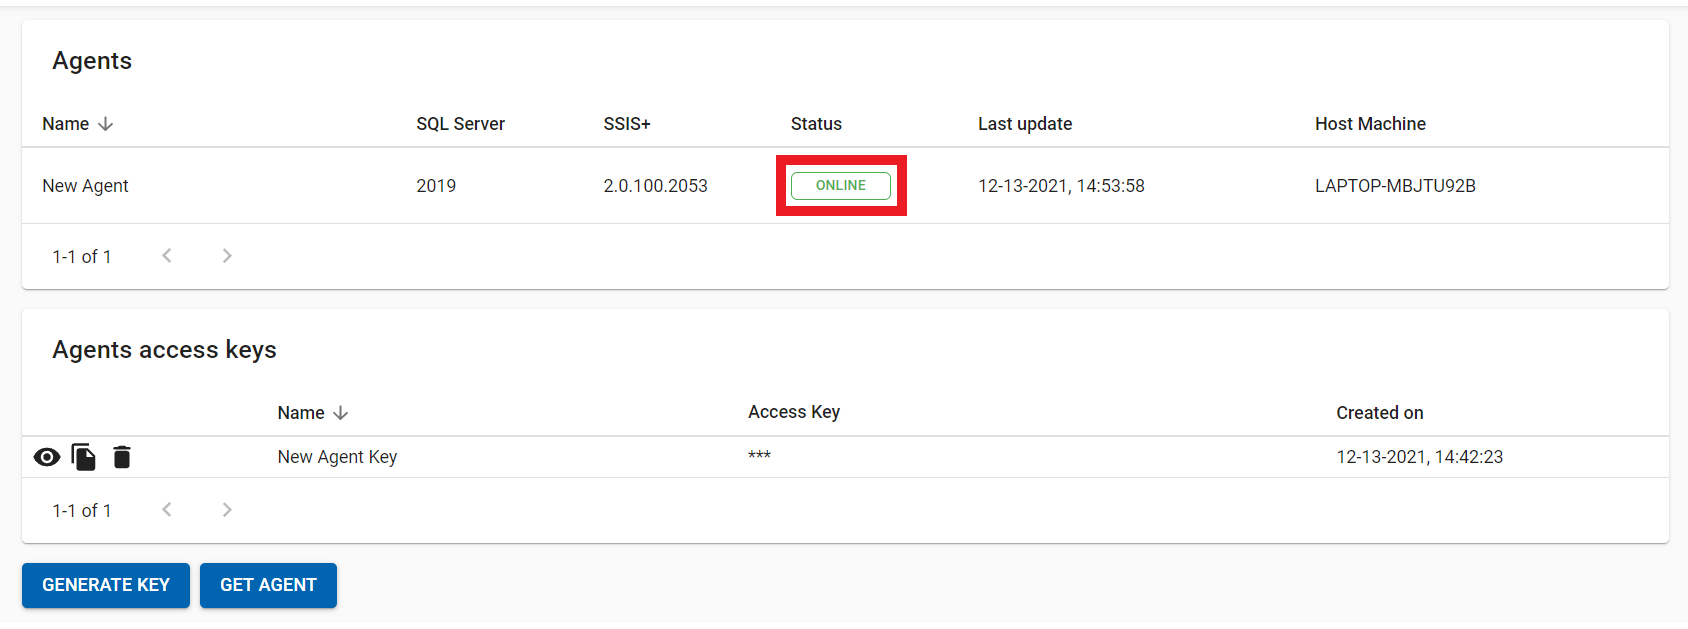
Wait a couple of minutes and refresh the Agents page in the web app. Your Agent should appear as ONLINE. Now you can start uploading packages.
Alternatively you can open on-premises agent user interface and ensure the service is running.
Execution machine maintenance
Prior to doing any sort of maintenance on an execution machine ( like installing Windows updates ) the COZYROC Cloud Agent should be stopped safely.
- Use the on-premises agent user interface to stop the Agent. It will stop after all currently running executions are completed.
- Do the maintenance activities.
- Start the
COZYROC Cloud Agentservice fromWindows Service Manager.
Configuration changes and updates
The process of both changing the Agent configuration and applying updates is the same.
- Download the Agent installer.
- Important: Stop the
COZYROC Cloud Agentservice from on-premises agent user interface to ensure no executions will be accepted or interrupted during the update. - Start the installer and follow the steps. Change configuration values, if needed.
- The installer will automatically start the Agent service at the end.
Agent self-update (recommended)
Since version 2.1.1.7609 of on-premises agent you can start self-update procedure through
the management app when there is a newer version of the agent and your agent is Online. We recommed you to use this method to update your agents, because it reduces the risk of data loss by waiting for currently running executions to finish before starting the update procedure.
In that case you will see update agent button at the beginning of on-premises agents table row and a warning icon in front of your agent version as shown below.

If your agent version is less than 2.1.1.7609 you can still click on update agent button
but you will see a warning dialog that your agent version doesn't support self-update.
In that case you have to follow the instructions from the dialog and download latest agent version
and install it manually.

When you click on update agent button and if your agent version is eligible for update then your agent
status will change from Online to On Hold. The update procedure may take few minutes to complete.
Next you can hit the refresh button and if the procedure is successful you will see that your agent version
is updated and your agent is back Online.